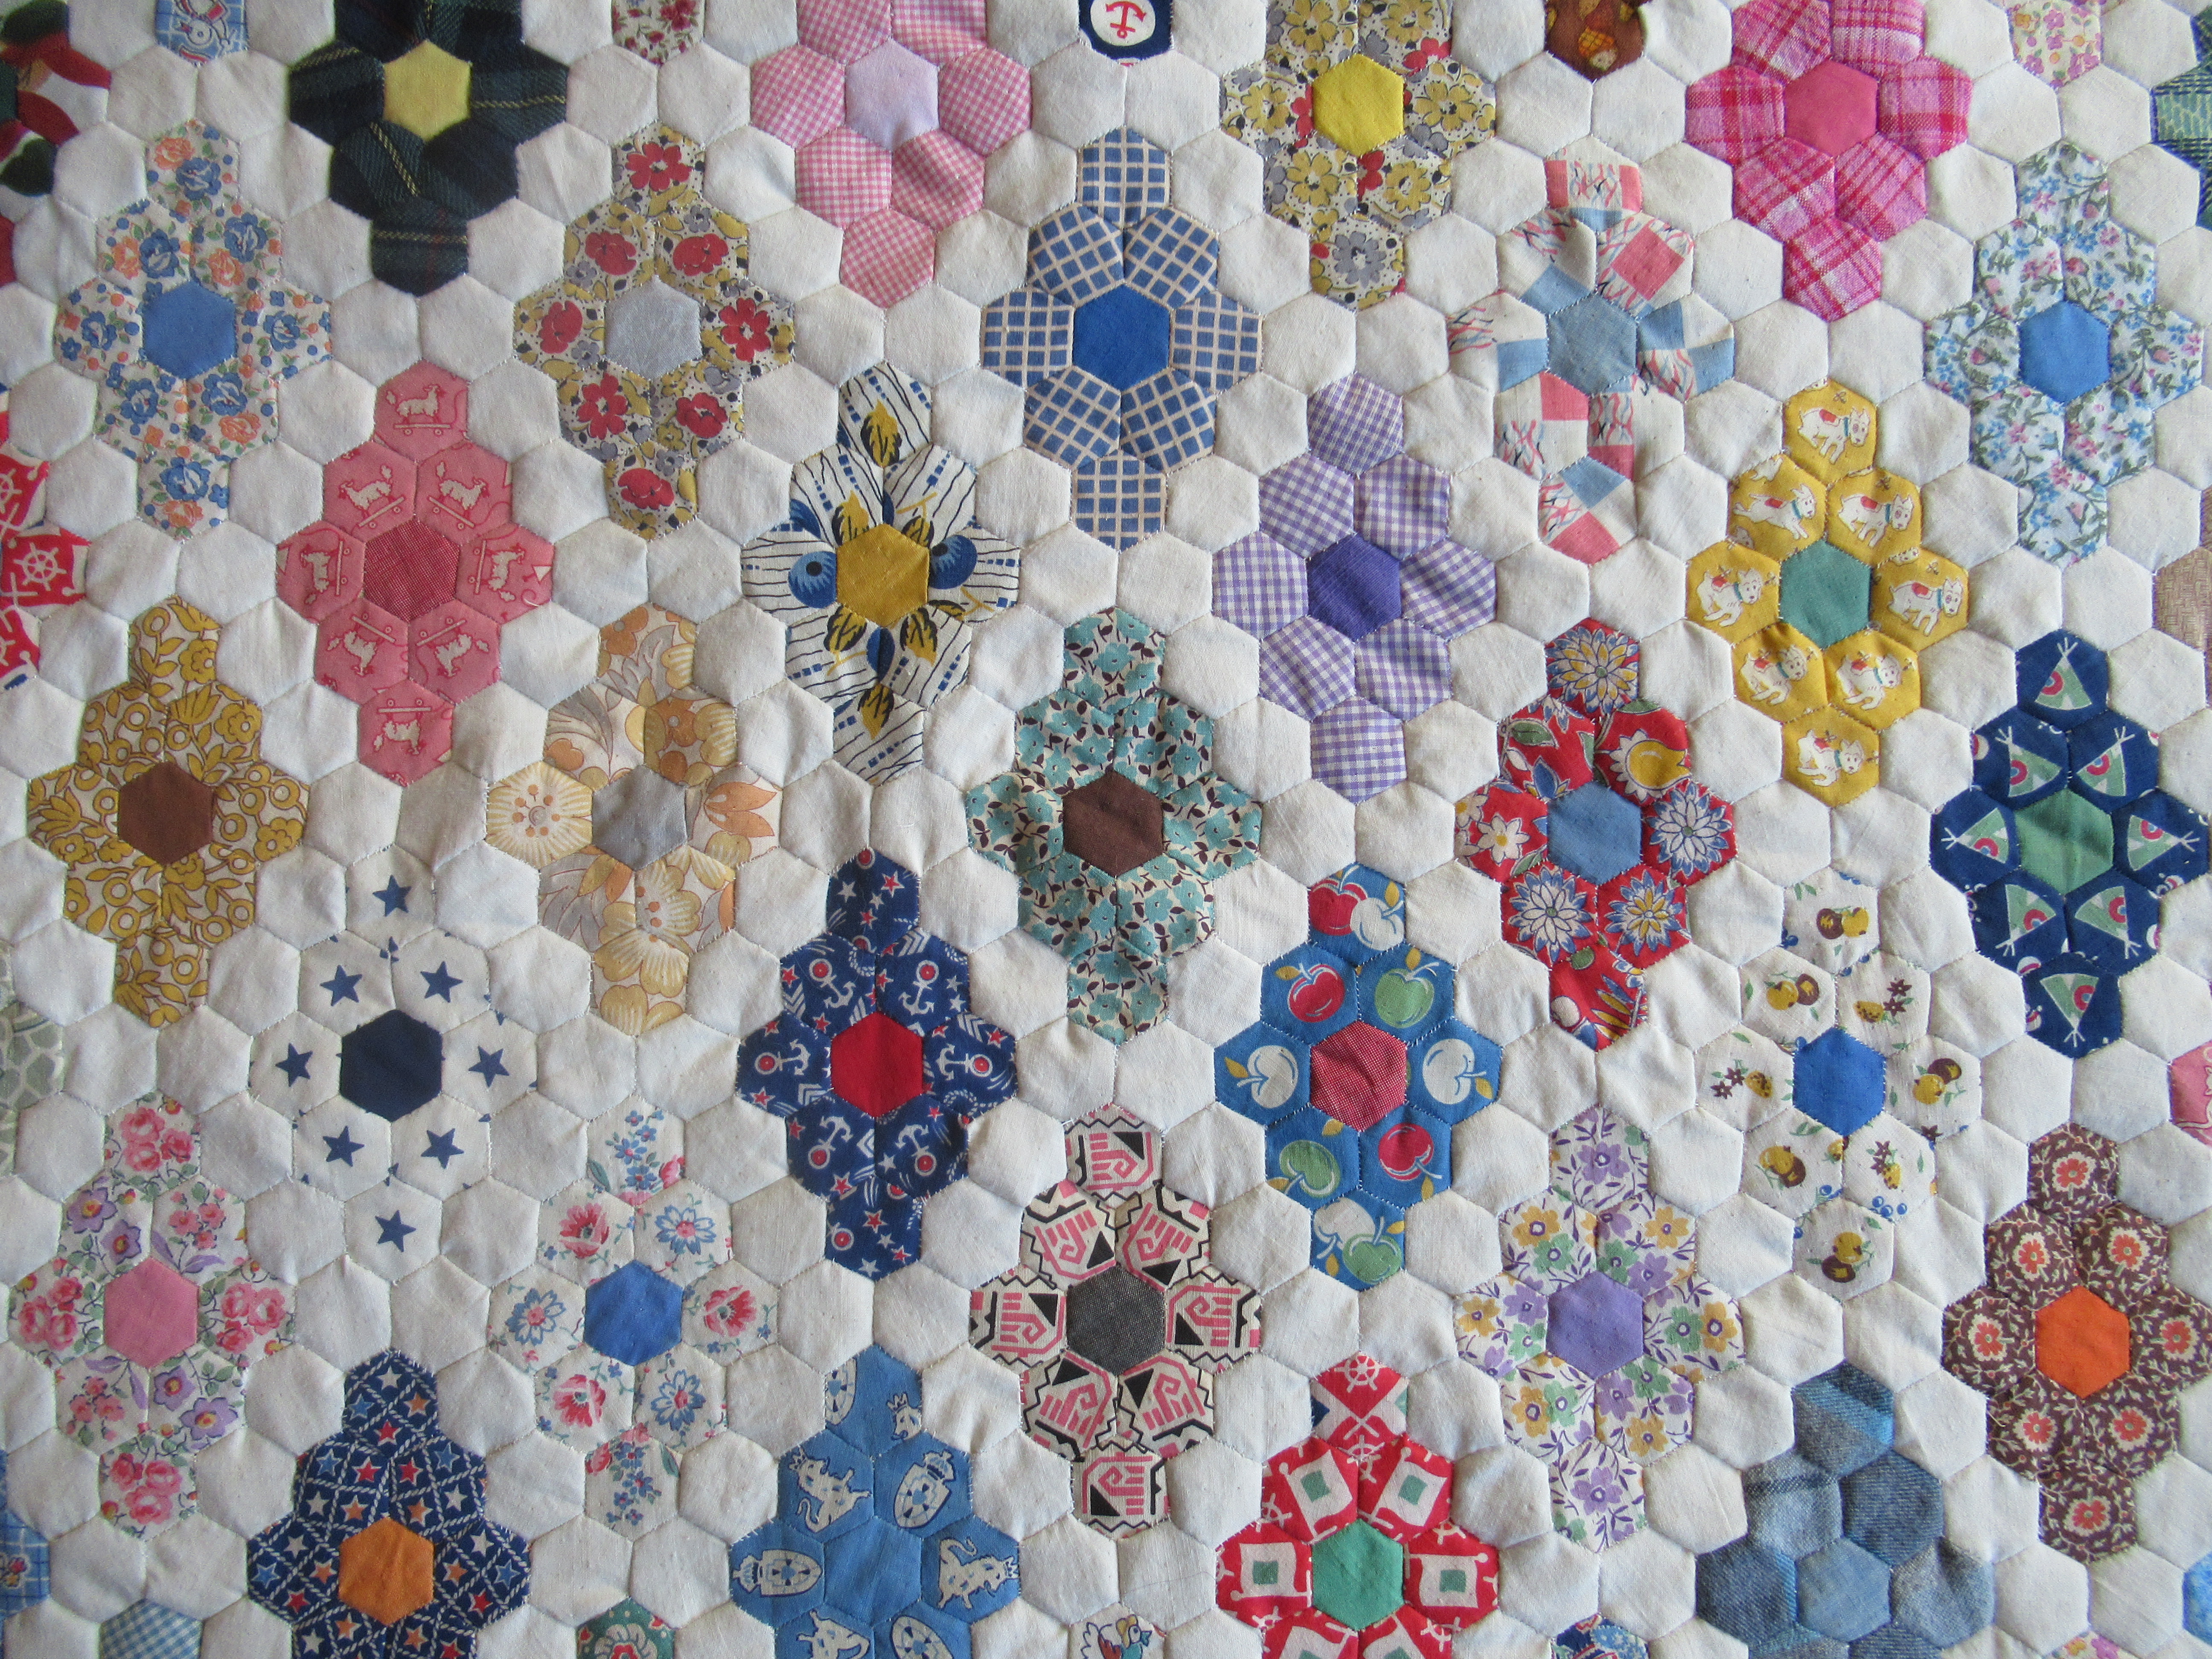
As I posted last week, my grandmother taught me how to do hand-stitched English Paper piecing quilts when I was a teenager. She shared with me a box of diamonds made from hexagons that she and my great-grandmother had made for years from clothing scrap fabric. My daughters and I are now using those pieces, along with new ones we are making from our scrap fabric, to make a quilt.
 There are a few different ways to do paper piecing, I am sharing how I was taught by my grandmother, which is how she was taught by her mother. There are many different shapes you can use, and sizes of shapes. The hexagons we are making are very small – only an inch across. I would suggest starting with something bigger – while these look really great, it is quite a tedious and time-consuming project to complete a quilt made with tiny hexagons. I have previously made a Christmas tree skirt with 4-inch hexagons and it was a much faster and easier project.
First, how to make the hexagons.

You will need hexagons made from sturdy paper, and fabric cut into circles big enough to wrap the hexagon in. When my grandmother taught me, she was hand-cutting each paper hexagon using a cardboard pattern. It was tedious and man it is tough to get a hexagon just exactly even! I was very excited when I found that you can get die-cut paper pieces online. I happily bought a package of hexagons that are each the same and I don’t have to do any cutting. My personal favorite is the store Paper Pieces.

You take the fabric circle and carefully start wrapping it around the hexagon, one side at a time, being sure you are getting it tight along the straight edge and keeping the corners nice.
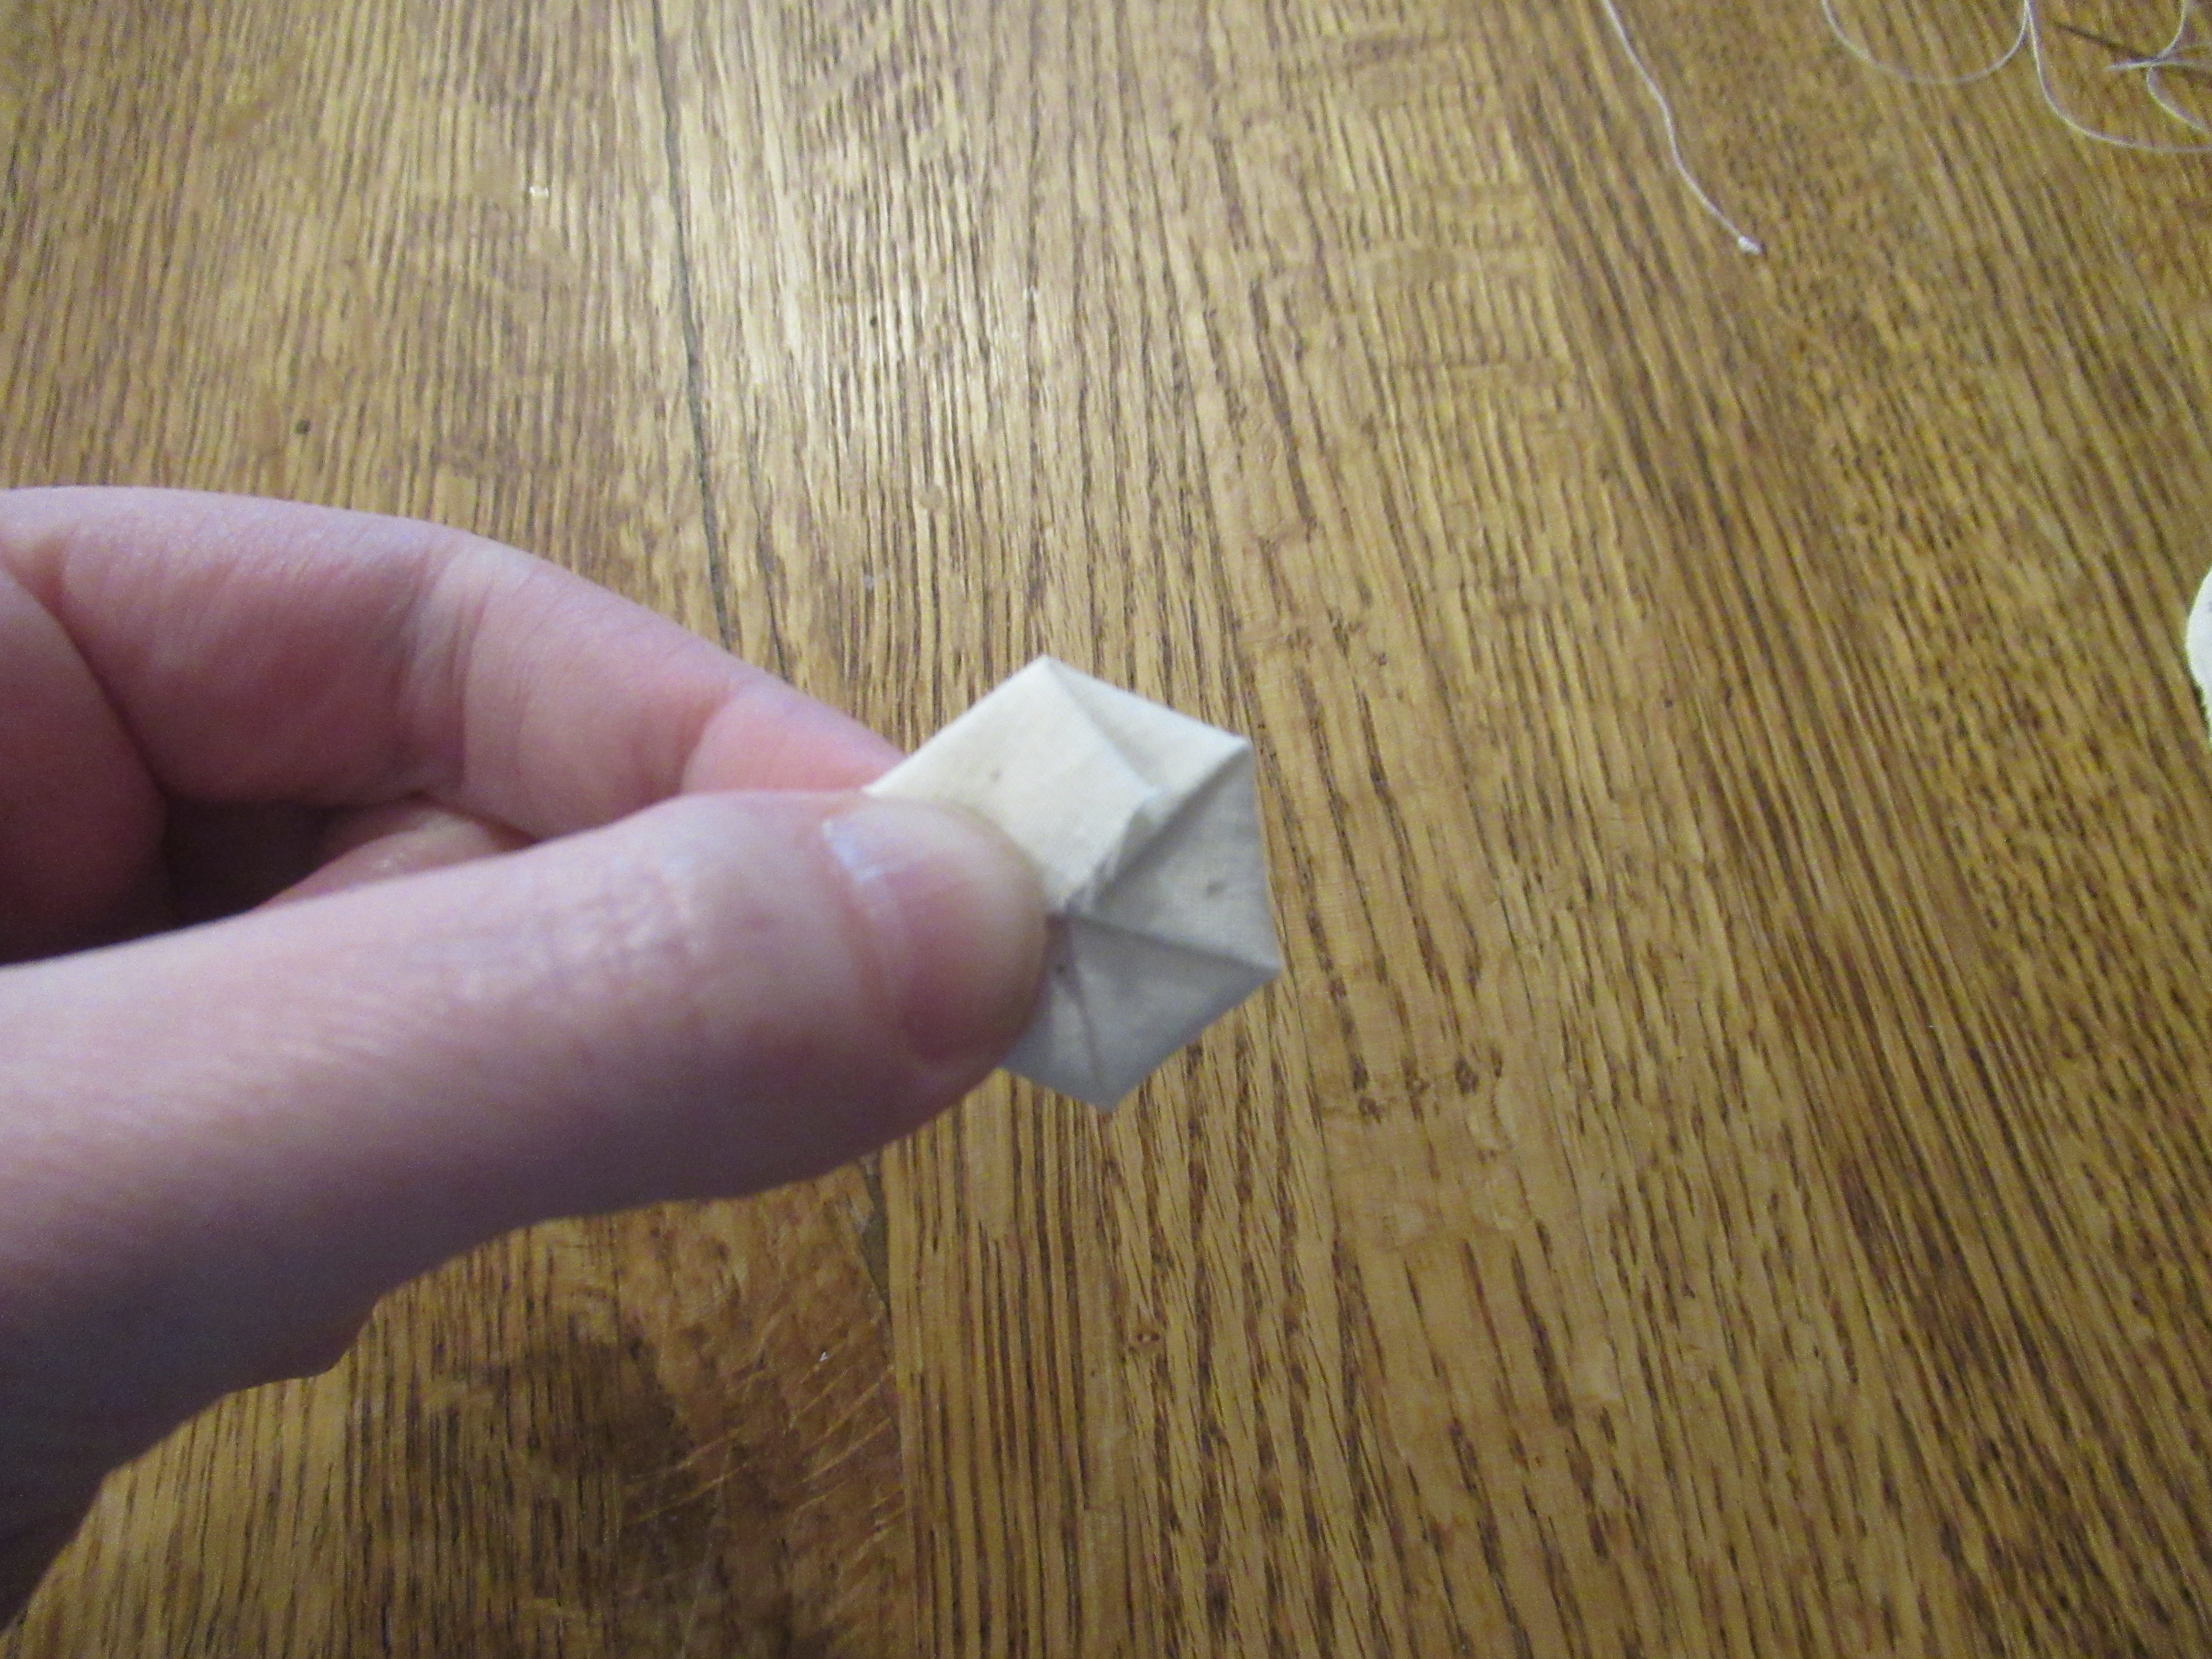 Then, using some cheap thread, you baste the fabric onto the paper hexagon with a few stitches. You want it held firmly, but you will remove these later so you want them big and easy to get out.
 Now it is time to hook the hexagons together. You can obviously do this in any number of patterns using different fabrics etc. My grandmother and great-grandmother made diamonds out of 9 hexagons, making the center hexagon a solid complimenting color.

I decided to hook them together with white hexagons in between as a border for a simple vintage look.
To hook them together, you place two hexagons right-sides together and whip stitch along the straight edge, being careful to grab a little of each fabric but not the paper that is inside of each piece. I occasionally grab a tiny bit of the paper, it is bound to happen, just try to not stitch to far onto the paper and not too often.


When you are finished, do not tie off or cut your thread. As you see when you open it up one side is now attached.

Turn the pieces right sides together with the next side that needs to be attached and continue your whip stitching along that side. Repeat for as many sides as need to be attached for that piece.

In this example I am attaching the white border pieces to my already in-process quilt. As you can see, I keep attaching white borders along the edge of the colorful diamond.


Once they are in place I attach another diamond set.


It is done like the single hexagons, one edge at a time, working my way around all the edges.

Then I add more white and so forth and so on, building the quilt up a little at a time.

It is important not to remove any of the paper until a piece is sewn on all edges, because the paper holds the shape for you. As you can see here, I have removed all the basting stitches and paper from all the interior pieces, but the border pieces that are not surrounded fully yet still have their basting stitches and papers.

To remove the paper you just clip the basting stitches, turn to the back, gently open the fabric and pull out the piece.


Some methods of putting the fabric on the paper leaves a lot less fabric on the back than this method. However, I am trying to copy the method used to make all the diamonds, so I am doing it this way. I think it will add some nice bulk to the quilt and make it warmer too.
That’s all there is to it -the basics of how to do hand-stitched English Paper Piecing Quilts. I find them very enjoyable, and I love that they are a craft that is mobile – in that I can take it places to work on it or work on it in a recliner, as opposed to being at a sewing machine. Try it out yourself!

I love your diamonds. Thanks for the inspiration x
LikeLike
So beautiful. It will definitely be a heritage item to pass down through the generations when you are finished. Thank you for teaching us. I wondered how “paper piecing” worked when you mentioned it. And I love that you are teaching your kids the skills as well.
LikeLiked by 1 person
I love your quilt! I recently became interested in paper piecing and started a project similar to yours with diamonds made from hexagons, increasing the number of hexagons as I work from center outwards. I was wondering if you kept count of how many hexagons you actually made for the whole quilt.
LikeLiked by 1 person
That sounds pretty! No, we haven’t kept count.
LikeLike